How To Fit A Heated Towel Rail
When fitting a heated towel rail in your bathroom you should first ensure you buy the correct one. Firstly this means checking the heat output is sufficient for your needs either to heat the room and dry your towels or just to dry the towels. We suggest using a heat calculator to work this out. Secondly this means also checking that the material that the item is made from works with your system:
-
Steel rails (both Chrome plated and painted) are only suitable for closed or indirect heating systems as rust inhibitor can safely be added to these systems
-
Stainless steel rails are suitable for use on nearly all central heating systems - direct and indirect
-
Brass based rails are also suitable for use on nearly all central heating systems - direct and indirect
Thirdly you need to ensure that if you are planning to mount the towel rail on the wall that the mountings and weight of your purchase are suitable for the wall you plan to hang it on.
Other general points to keep in mind are to check all part are present before commencing installation and ensure that a Gas Safe registered heating engineer completes the work.
|
|
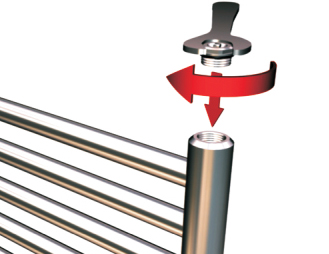
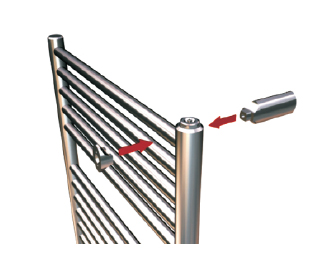
Step 1 - Screw the air vent plug into the top thread of the rail and tighten with an appropriate spanner. |
|
|
Step 2 - Turn the rail upside down and fit the radiator valve tails using PTFE tape - tighten these with a spanner. |
|
|
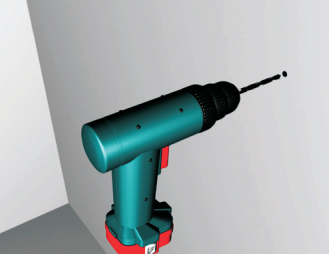
Step 3 - Select the desired mounting position, ensuring that the bottom rail is at least 150mm off the floor to allow for the valves. Mark and drill the holes. |
|
|
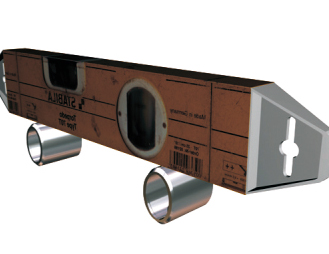
Step 4 - Loosely screw the wall support to the wall but do not tighten fully so you can level the supports. |
|
|
Step 5 - Adjust the wall supports up or down till they are level then tighten them. |
|
|
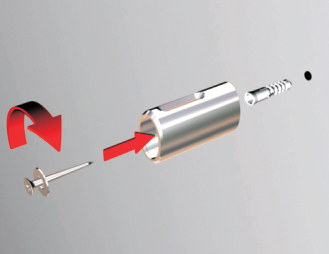
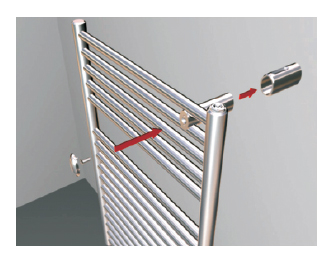
Step 6 - Loosely fit the bracket stems (the bit that attaches to the radiator and inserts into the wall supports) to the radiator but do not tighten fully in case adjustment is needed. |
|
|
Step 7 - Align the bracket stems with the wall supportsand manouvre the rail back towards the wall. Once fitted tighten the brackets using a screwdriver |
|
|
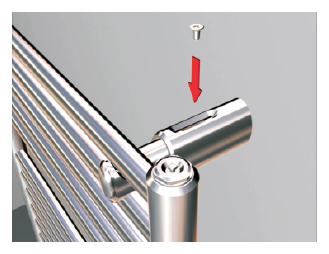
Step 8 - Insert the mini grub screw and tighten then fit any cover caps if provided. |
|
|
Step 9 - Fit the radiator valves and connect the pipework. Check all fittings are tightly secured. Fill the system with water and check for leaks. If no leaks are found then flush the system completely using a central heating cleanser - this is essential for long product life. Fill the system again with water and do a hot test of the rail and system.If the system is 100% water tight add a central heating rust inhibitor. When the system is at full temperature bleed any trapped air. |

To see our selection of heated towel rails, please find them here: Bathroom Heating Solutions