Silicone Vs Grout: What’s Best When Renovating Your Bathroom?
As an area that is constantly deluged by water, steam and condensation, the bathroom is in need of fittings that can stand these type of conditions on a daily basis. You also need to make sure that you’re using the correct products when installing these fittings, so that the finished result is smooth and watertight. Using the wrong type of finish when fitting a bath or bathroom sink can result in water collecting and producing black mould, which is very hard to get rid of.
When installing a bathroom fitting you should use either silicone or grout in order to ensure a complete watertight finish. However, both of these materials have different benefits and drawbacks and are best used in specific locations in the bathroom.

What is grout?
Grout is much thicker than a silicone alternative and is generally a composite of water, cement, sand, a colour tint, and sometimes fine gravel, if you’re using a bulkier product to fill larger gaps. It helps to fill space between tiles and hardens over time. To apply grout simply scrape it all over the tile face and stuff the mix between any gaps between tiles, wiping afterwards with a sponge to remove excess. Residue on the tile face should not stick to smooth tiles but needs to be removed whilst still wet to make it easier. On rougher surfaced tiles, cleaning before the grout dries is essential.
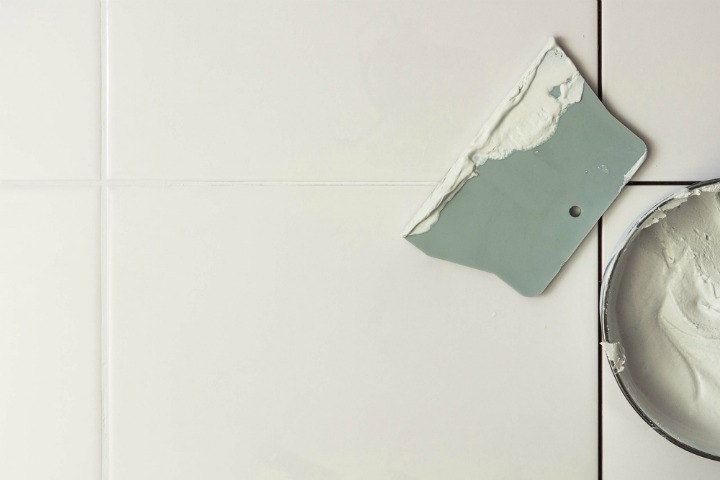
Grout is a hardwearing emulsion but should only be used between joints of the same plane. This means any corners or bends that your tiles and fittings encounter should be handled with silicone instead. This is because grout is not flexible enough to withstand any structural movement. It is also not entirely waterproof. Grout that has had latex added to its mixture is more waterproof than those mixes without, but overall this product is more porous and thus more susceptible to mould growth. A grout sealing agent that acts like a varnish can be applied after the grout dries to make it waterproof and mould resistant but this generally needs to be reapplied every few years.
What is silicone?
Silicone is used to fill or seal crevices and seams in order to make them completely water and airtight. This product is most commonly seen around the edge of windows and where such fittings as baths and sinks reach the tile surrounding them. Much more flexible than grout, it can absorb movement where grout would be liable to suffer cracking.
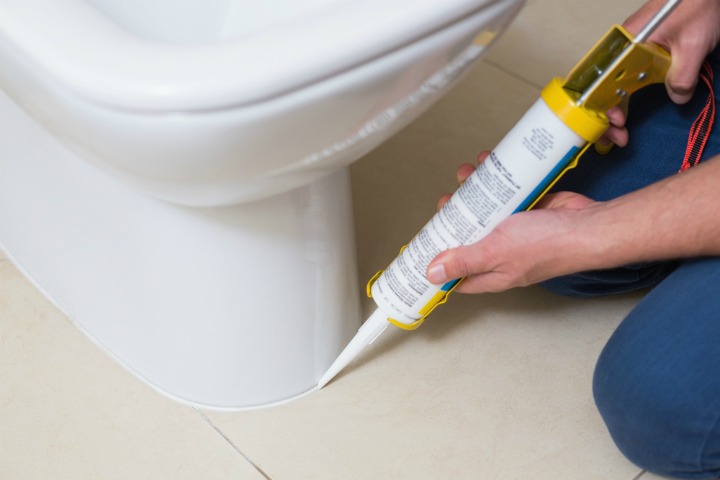
Applying silicone sealant is much more difficult than applying grout, as precision is key to achieving that perfect finish. Unlike grout, it is strong enough to adhere to the surface of tiles and fittings, which is why being attentive when applying the product is paramount to ensure you don’t have any of the mix messily attached where you don’t want it. Unlike grout, it shouldn’t be used in large spaces when renovating your bathroom, as it can shrink over time, meaning you’ll be left with inviting spaces for water to sit in and develop mould.
Renovating your bathroom with grout
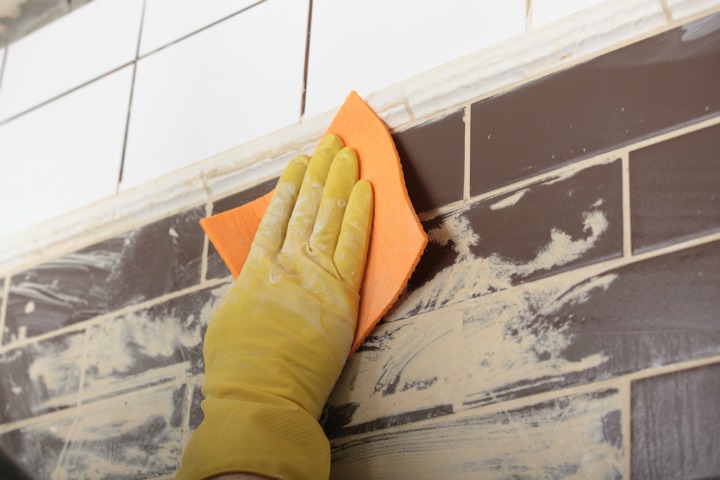
Grout is a messy product and you should prepare properly if you’re planning on fitting this yourself. Wear gloves, clothes that you don’t mind getting messy and mix the grout until it has the consistency of toothpaste. Remove the spacers between your tiles and spread a generous amount of grout onto the tiles using a grout applicator. Use the flat edge of the applicator to remove excess grout, the rest of which can be wiped away later using a wet, not soaking, sponge. Once the grout is completely dry you should buff the tiles and wipe with a soft cloth.
Renovating your bathroom with silicone
As stated, much more care needs to be taken with silicone than grout, to make sure you don’t have any permanent messiness affixed to your tiles and fixtures. Once you’ve ensured you have the correct sealant for renovating your bathroom, thoroughly remove any pre-existing sealant that may be in place and give the area that you plan to work on a good clean. This will ensure there is no dirt or greasiness that could prevent the silicone from gripping into place.
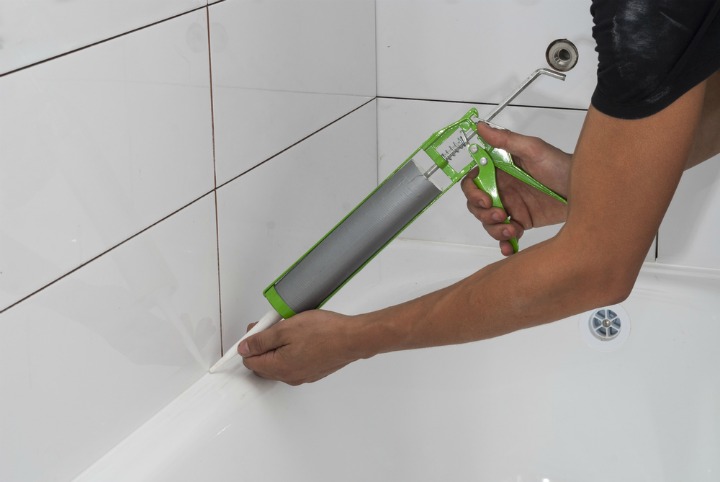
Masking tape can help to guarantee a straight line of sealant. Simply place two strips either side of where you wish to work, with a big enough gap left for the silicone. Cut the nozzle of the silicone at an angle and move steadily as you apply the product. Use a finger wetted with soapy water to run along the length of the silicone to make it completely even, wiping on a rag afterwards. Do not use saliva as doing so introduces the bacteria from your mouth into the silicone before it is cured - this can lead to mould growth from within the silicone! If you make any mistakes, silicone can be removed with a knife and sponge once dry.